| This article is a stub. You can help Mordheim: City of the Damned Wiki by expanding it. |
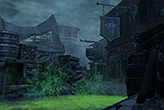
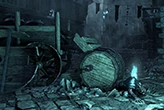
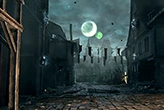
Quayside
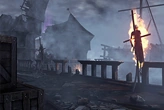
Foggy, gloomy and unpredictable are three words that best describe the Quayside. With all its docks open to the River Stir, anyone or anything can land inside the walls of Mordheim.
The Quayside appears in every faction's single-player campaign. The map often features barrels of explosives which must be collected and placed in certain locations to thwart an enemy faction's plans, for example collapsing sewer tunnels to prevent skaven from accessing the area or destroying barges to stop human mercenaries transporting wyrdstone.
The Quayside is the setting for the following single-player campaign levels:
Wharf Rats - Human Mercenaries Act I, Part I
Dock Whallopers - Skaven Act I, Part I
River Raiders - Sisters of Sigmar Act I, Part II
Rat Hunt - Cult of the Possessed Act I, Part III
Of Rats and Mutants - Witch Hunters Act I, Part I
Grave Fog - Undead Act I, Part IV
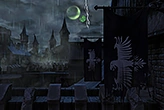
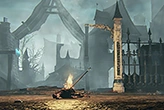
Temple of Sigmar
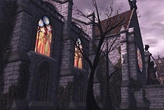
Untouched by the devastation of the Twin-Tailed comet, the Temple of Sigmar of the Merchant District still stands tall and strong. Outside its hallowed walls however, chaos and destruction reign.
The Temple of Sigmar appears in every faction's single-player campaign, with the objective usually to re-dedicate it to the player faction's god or gods: Sigmar for Human Mercenaries and Sisters of Sigmar, the Great Horned Rat for the Skaven and the Chaos Gods for Cult of the Possessed.
The Temple of Sigmar is the setting for the following single-player campaign levels:
The Divine and the Defiled - Human Mercenaries Act I, Part II
Rats in the Belfry - Skaven Act I, Part III
Living on a Prayer - Sisters of Sigmar Act I, Part I
Shadows in the Sanctuary - Cult of the Possessed Act I, Part I
Temple of the Seduced - Witch Hunters Act II, Part II
The Martyr's Mourners - Undead Act I, Part II
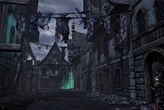
Great Library
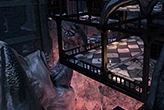
Once known as a tremendous repository of knowledge, the Great Library of Mordheim is now nothing but a decaying structure teeming with chaos, destruction, and unspeakable terrors that could make anyone lose their sanity.
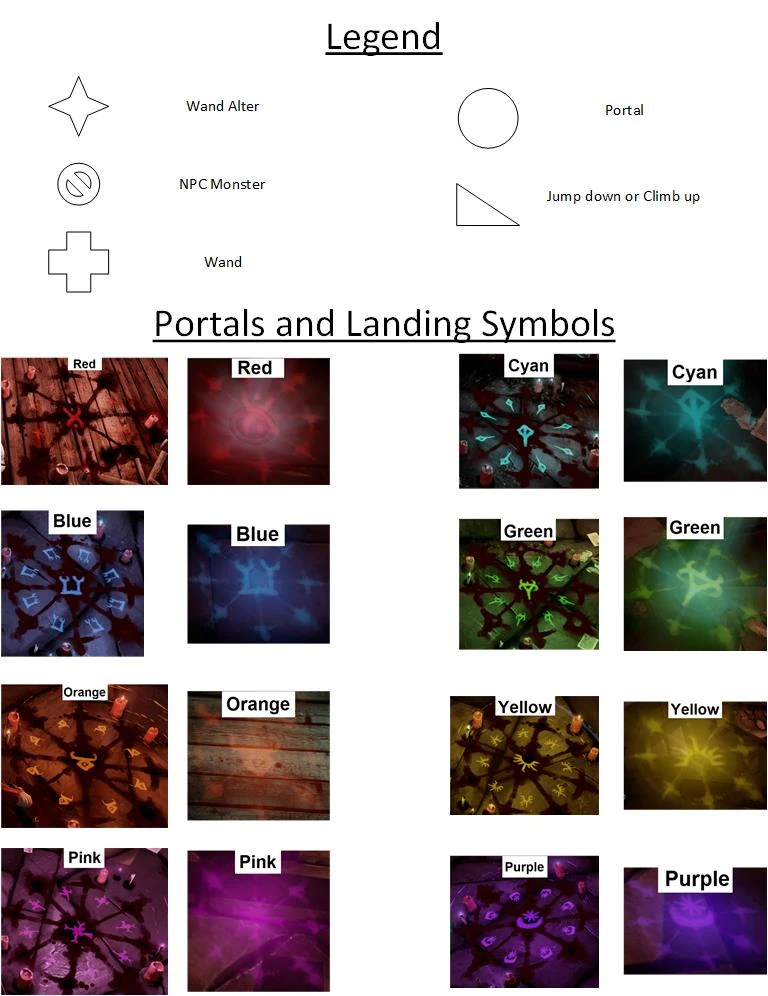
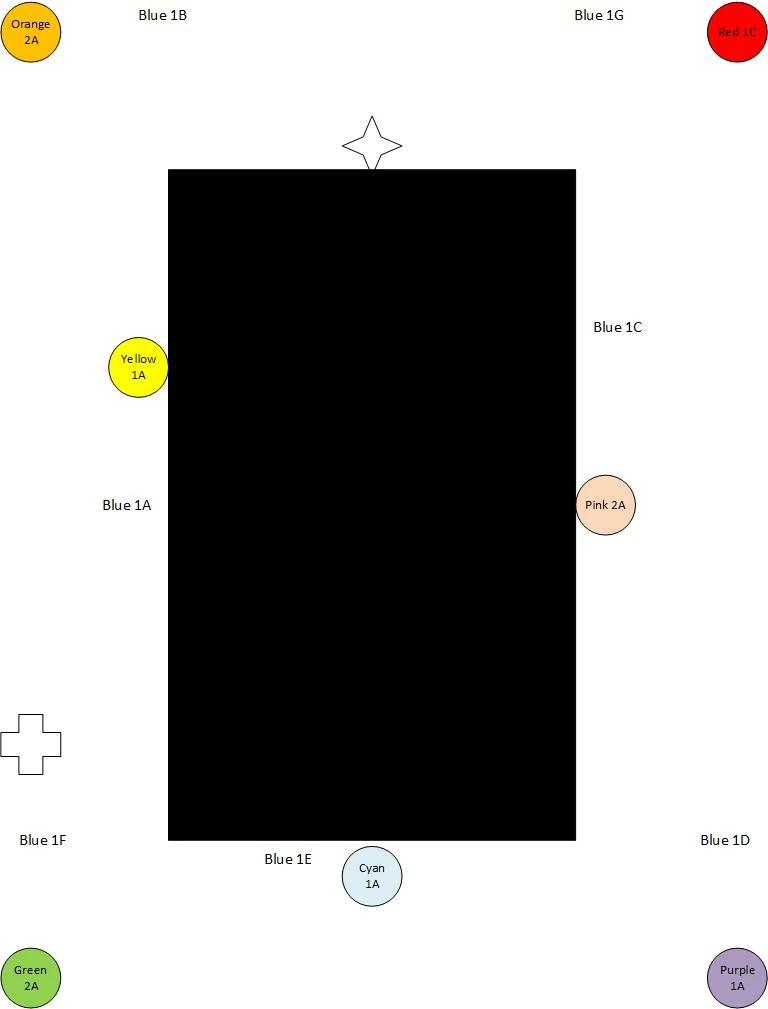
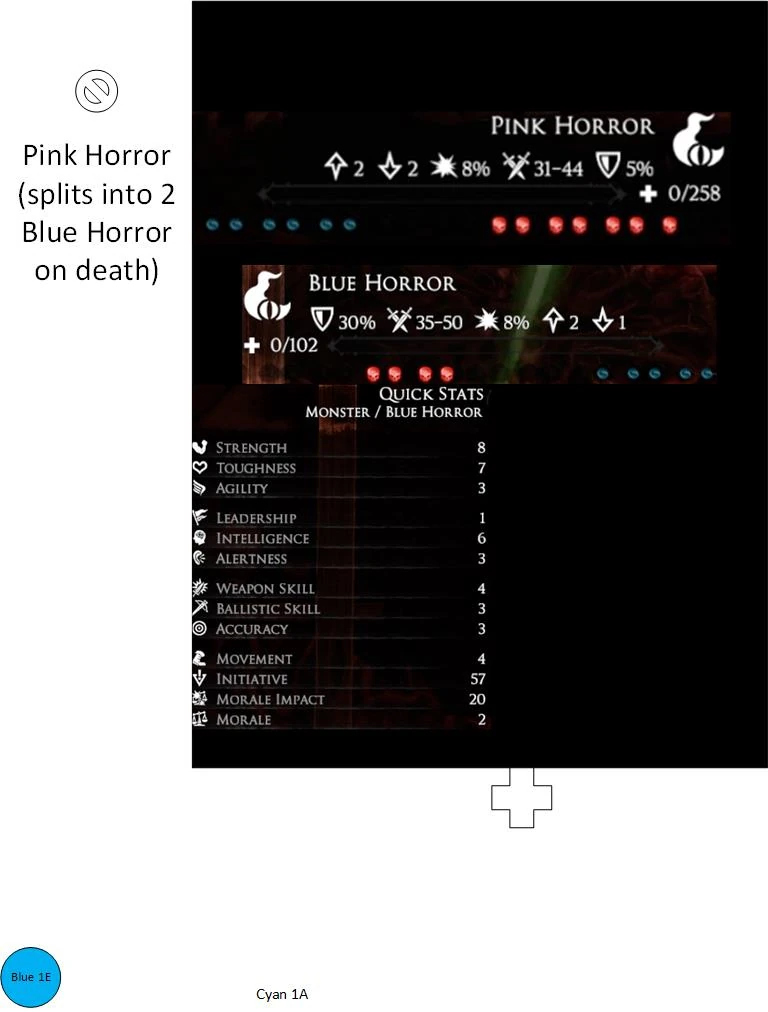
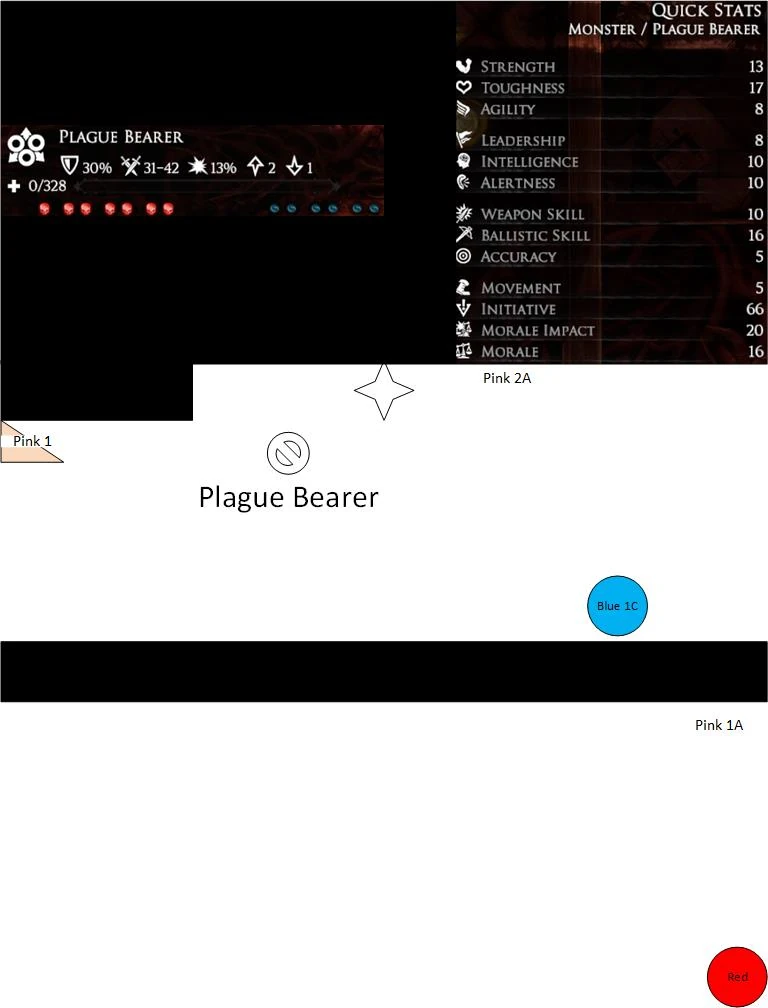
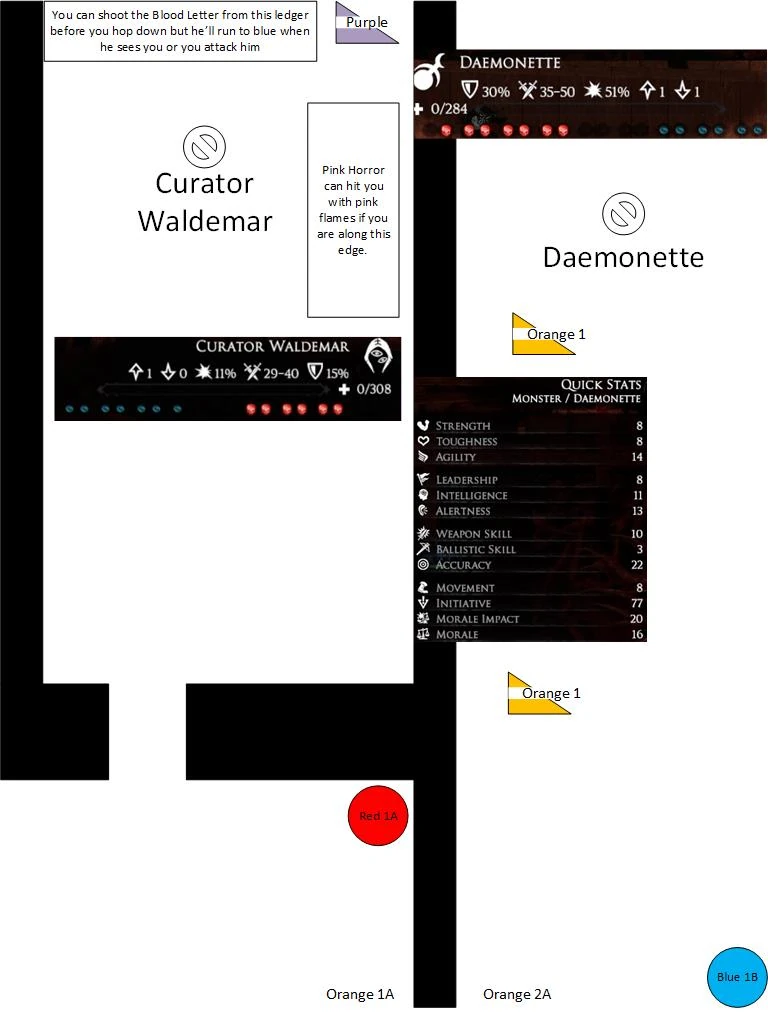
The Great Library appears in every faction's single-player campaign. The objective is often to recover an important book, such as an historical treatise that could aid the faction's patron or a notebook containing dark spells that the player's faction can use. The library's levels are very broken up and travel between them is only possible through coloured portals on the ground, or in a few cases, jumping down from one to the other. Unlike most maps, the single-player campaign version of the Great Library does not feature an enemy warband, but rather a number of hostile daemons and a unique enemy character named Curator Waldemar.
The Great Library is the setting for the following single-player campaign levels:
Bookworms - Human Mercenaries Act I, Part III


 ]]
]]
Reading Frenzy - Skaven Act II, Part I
Eldritch Lore - Sisters of Sigmar Act I, Part IV
The Eye of Change - Cult of the Possessed Act I, Part IV
Loathsome Lore - Witch Hunters Act I, Part II
Lothar's Legacy - Undead Act I, Part I
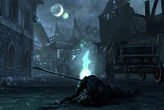
Marketplace
Once, the Marketplace was the heart of commerce in Mordheim. The merchant stalls overflowed with trade goods from all over the world. Very little remains now that the city has been repeatedly plundered. Who knows what can be found in this now chaos-infested place.
The Marketplace appears in every faction's single-player campaign. It is largely covered in pools of acid which the player warband must navigate and also features the Manticore, the most powerful monster in the game.
The Marketplace is the setting for the following single-player campaign levels:
Birthday Present - Human Mercenaries Act II, Part IV
The Stone-eater - Skaven Act II, Part IV
Creature of Chaos - Sisters of Sigmar Act II, Part III
Carrion Eaters - Cult of the Possessed Act II, Part III
By Sword and Claw - Witch Hunters Act II, Part I
Blood of the Beast - Undead Act II, Part III
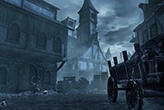
Middle Bridge
The Middle Bridge is located as the very center of Mordheim, spanning the River Stir. Despite being ravaged by the Twin-Tailed Comet, the Middle Bridge still stands, dutifully linking the districts of Mordheim. A position of obvious tactical advantage for whoever seeks to control Mordheim.
The Middle Bridge appears in every faction's single-player campaign. As well as the bridge top, the map sometimes features tunnels beneath which are often haunted by skaven. The player's objective is usually to stop an enemy faction from taking advantage of the bridge's superior tactical position.
Middle Bridge is the setting for the following single-player campaign levels:
Bridge on the River Stir - Human Mercenaries Act I, Part IV
Water Under the Bridge - Skaven Act I, Part II
Message in a Poison Bottle - Sisters of Sigmar Act I, Part III
Slave of the Shadow - Cult of the Possessed Act II, Part I
The Elser has Flown - Witch Hunters Act I, Part III
Blood for the Blood God - Undead Act II, Part II
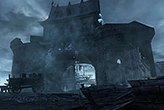
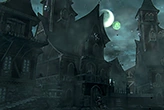
Raven Barracks
The headquarters of the Mordheim city guard was the last bastion of sanity when chaos first gripped the city. The guards fought vigorously against their inevitable demise. Now that madness reigns, only the brave or the foolish dare penetrate the dark towering walls of the Raven Barracks.
The Raven Barracks appear in every faction's single-player campaign. The objective is often to steal a valuable weapon such as the rune-blade Griffonbrand, and map sometimes features a shrine to Khorne and Bloodletters.
The Raven Barracks are the setting for the following single-player campaign levels:
Madman of Mordheim - Human Mercenaries Act II, Part I
Weapon Theft - Skaven Act I, Part IV
Blood of the Templar - Sisters of Sigmar Act II, Part II
Blade of Darkness - Cult of the Possessed Act I, Part II
There Will be Blood - Witch Hunters Act I, Part IV
Armies of the Night - Undead Act I, Part III
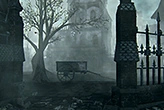
Statue of Count Gotthardt
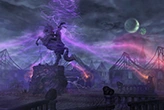
A great statue honouring Count Gotthardt stands miraculously untouched at the center of this plaza. A popular attraction before the cataclysm, it now acts as a beacon amidst the encroaching darkness and destruction.
The Statue of Count Gotthardt appears in every faction's single-player campaign. The map often features prison wagons from which the player warband can free allies, or stone obelisks which focus a sorcerous ritual. The Statue of Count Gotthardt is the setting for the following single-player campaign levels:
Servant of the Shadow Lord - Human Mercenaries Act II, Part II
Exterminators - Skaven Act II, Part II
Gateway of the Gods - Sisters of Sigmar Act II, Part IV
Shadowforged - Cult of the Possessed Act II, Part IV
Dark Rites of Chaos - Witch Hunters Act II, Part III
Count Steinhardt’s Palace

The Palace of Count Steinhardt was once Mordheim’s most preeminent court. Nobles of all aspirations never missed a chance to be seen mingling and dancing within its great halls. Since the Twin-Tailed Comet destroyed the city, the only forms still dancing in the ballroom are the swirls of shadow and malice locked forever in a passionate tango of chaos.
Count Steinhardt's Palace appears in every faction's single-player campaign. Like the Great Library it does not feature an enemy warband but rather a number of hostile daemons, usually daemonettes, and a special character called the Alluress. In most missions the Alluress will continually resurrect herself unless five purple wyrdstones are collected, and she will also have a slave-warrior from each faction.
Count Steinhardt's Palace is the setting of the following single-player campaign levels:
Palace of Profane Pleasures - Human Mercenaries Act II, Part III
Scent of Seduction - Skaven Act II, Part III
Seduction of the Innocent - Sisters of Sigmar Act II, Part I
Dance of the Daemon - Cult of the Possessed Act II, Part II
The Dance of Swords - Witch Hunters Act II, Part IV
Ancient Sorceries - Undead Act II, Part I
Merchant Quarter Map 1
A simple urban layout in a flat area of the city. Vantage points can often be found among the destroyed buildings.
Merchant Quarter Map 2
A dense urban sector featuring a street flanked by two elevated areas. Be mindful while traversing this low ground, as the nearby elevations provide tactical superiority.
Merchant Quarter Map 3
This area of the city features multiple levels of city streets overlooking one another. Limited access between levels creates vital choke points that can be leveraged to outmaneuver your enemy
Merchant Quarter Map 4
Even for experienced warbands, navigating this area of the city can prove challenging. Quirky pathways, and ruined buildings connect three levels of city streets.
Noble’s Quarter Map 1
In stark contrast to the dense squalor of the market district, the Noble’s quarter boasts wide streets, generous courtyards and opulent mansions; everything to accommodate a Nobel’s wealth and stature.
Deployment Ambush: https://drive.google.com/drive/mobile/folders/1w8inm-vR-znFMsRrizR_wWO4h2v-LxGn
Noble’s Quarter Map 2
Nobles perched inside their grand mansions considered their stations threatened by the less fortunate in the streets below. In an effort to distance themselves from the slums, all accesses to the lower grounds were closed off and a large fence was erected.
Noble’s Quarter Map 3
Nobles often grouped their spacious mansions together in order to isolate themselves from the common rabble. Large courtyards and majestic landmarks form a barrier between their opulent mansions and the rest of the city.
Noble’s Quarter Map 4
This section of the Noble’s Quarter offers quite a logistical challenge. Long Streets, large courtyards, and looping pathways offer ample opportunity to chase your enemy around.